
Removing barriers to MEANINGFUL technology use!
Small goals. Attainable accomplishments. Huge payoff.
If you follow me on Twitter (@brianyearling) you saw my mid-June post about my oldest daughter’s softball team. If not, here it is.

Goals in mid-June:
Win another game!
Small Goals
What I did not say in that brief Twitter post is how we got to a point that made even winning that one game possible for our team. It was simple, something easy to replicate, and it had an enormous pay-off for every girl on that team.
Each time we started practice or shifted to a new drill, we would ask the girls to think about their individual goal. What was it that they were specifically working on in that drill. If it was a hitting drill, what was that girl going to focus on so she could continually improve given her swing, her skill, and her playing style. When we shifted to base running or fielding, we asked the same questions: “What are you working on in this drill?" or “How will you grow as a player from this drill?” This started in January at our first practices.
Lofty goals feel good when we put them out into the world, but on their own they make for highly unattainable accomplishments. I work with educators each year who come into the school year ready to change everything about their teaching practice. They say things like, “This year will be different. I am going to…” and they outline an overhaul of practices and procedures that would make Elon Musk shrug his shoulders questioning the possibility of it all. Trust me when I tell you that these goals are honest and sincere — these teachers are ready and willing to make meaningful changes.
What is almost always missing, though, is a plan for the small, daily changes to habits and routines that will get them there. Without a plan for how we make daily changes in our classroom management routine, we resort to the practices that “worked” (and some of the practices that did not work) last year. Lacking a clear plan for how students will take greater ownership of their own learning each day, we slip into a much easier routine of student accountability through teacher expectation.
And this is where our softball player’s practice routine comes into play.
Attainable Accomplishments
Each practice our players had to confront the challenge of making positive change today. Yes, they wanted to hit better or throw harder, but the drill immediately in front of them did not require hitting or throwing. Instead it required footwork or body position. Asking the question, “What are you working on in this drill?” forced each girl to focus on how that body position helped her throwing windup, or how that footwork translated into a more consistent swing.
Moving from where we are to where we want to be is about having a goal, and then setting attainable accomplishments to get to that goal. If this is the year a teacher is going to find a way to make sure they have a way to see how each student is progressing in a lesson, to see each student’s work in real time (within Nearpod or Lumio) so they can monitor and offer meaningful feedback in the moment, that is an admirable goal. The next step is setting up the attainable accomplishments to get there.
This is where we can learn the most from the realities of our softball team. Some girls came in with a perfectly natural swing and were simply working on small things to tune up the swing. As a result, their attainable accomplishments to get to a small goal were drastically different than our players who had some major mechanical challenges in their swing. Those players had more work to do to get to their goal. The girls had to own where they were in order to get to where they wanted to eventually be as a player.
However, in both instances they were able to set attainable accomplishments in each drill to keep moving toward their goal. The same is true for every teacher; our skills and experience differ so greatly, but that does not mean we cannot reach our small goals to achieve our vision for improvement.
For that teacher working to find a way to have a view into every student’s work in real time during a lesson, they have to evaluate: 1) How comfortable am I with the technology I have available to achieve this task?, 2) How well can I establish classroom routines that will support this goal?, 3) How much time do I have to commit to designing these types of interactive lessons this year? and 4) Where can I make more time in my schedule to make it happen? The lofty goal is attainable through the daily and weekly attainable accomplishments the teacher sets and commits to meeting.
Finally, who will hold you accountable to the attainable accomplishments? Whether our players liked it or not, they were reminded regularly to focus on the attainable accomplishments in front of them. We were their accountability partners and coaches. Do you need an accountability partner? A coach? Will a sticky on your laptop keyboard remind you daily? Do you need to put a daily or weekly reminder on your calendar to create time to meet the goal? You will have to decide what step you need to take to make sure you stay accountable to the attainable accomplishments so you can realize the payoff you desire.
Huge Payoff
When I posted the photo of our team in mid-June I was brimming with excitement. Honestly, I was not certain that we would have many more wins. However, as one of our coaches said continuously, “Trust the process.” So we did. We kept practicing, we kept focusing on the attainable accomplishments, and we kept an eye on our goals of playing better and possibly winning more games.
Small goals, attainable accomplishments, and a vision for the success we want to achieve are a powerful recipe for meaningful change. This can be the year that you embrace the use of technology in your classroom in a way that will change the learning dynamic for students. It can be the year that you push for deeper learning by incorporating more project-based learning and creativity-focused tasks. It can be the year that you find your spark again and remember why you love this profession. It starts, though, with a vision, small goals, and attainable accomplishments that are repetitious and achievable; each is a step to a changed future.
As evidence, I want to share this follow-up story from our team’s performance in a tournament near the end of the season. After a loss and a tie on the first night of pool play in the tournament (which we were thrilled with as the competition was legitimately tough), our commitment to small goals and attainable accomplishments took root. This group of girls committed to each other and went on to win three games in a row, earning their spot in the championship game.
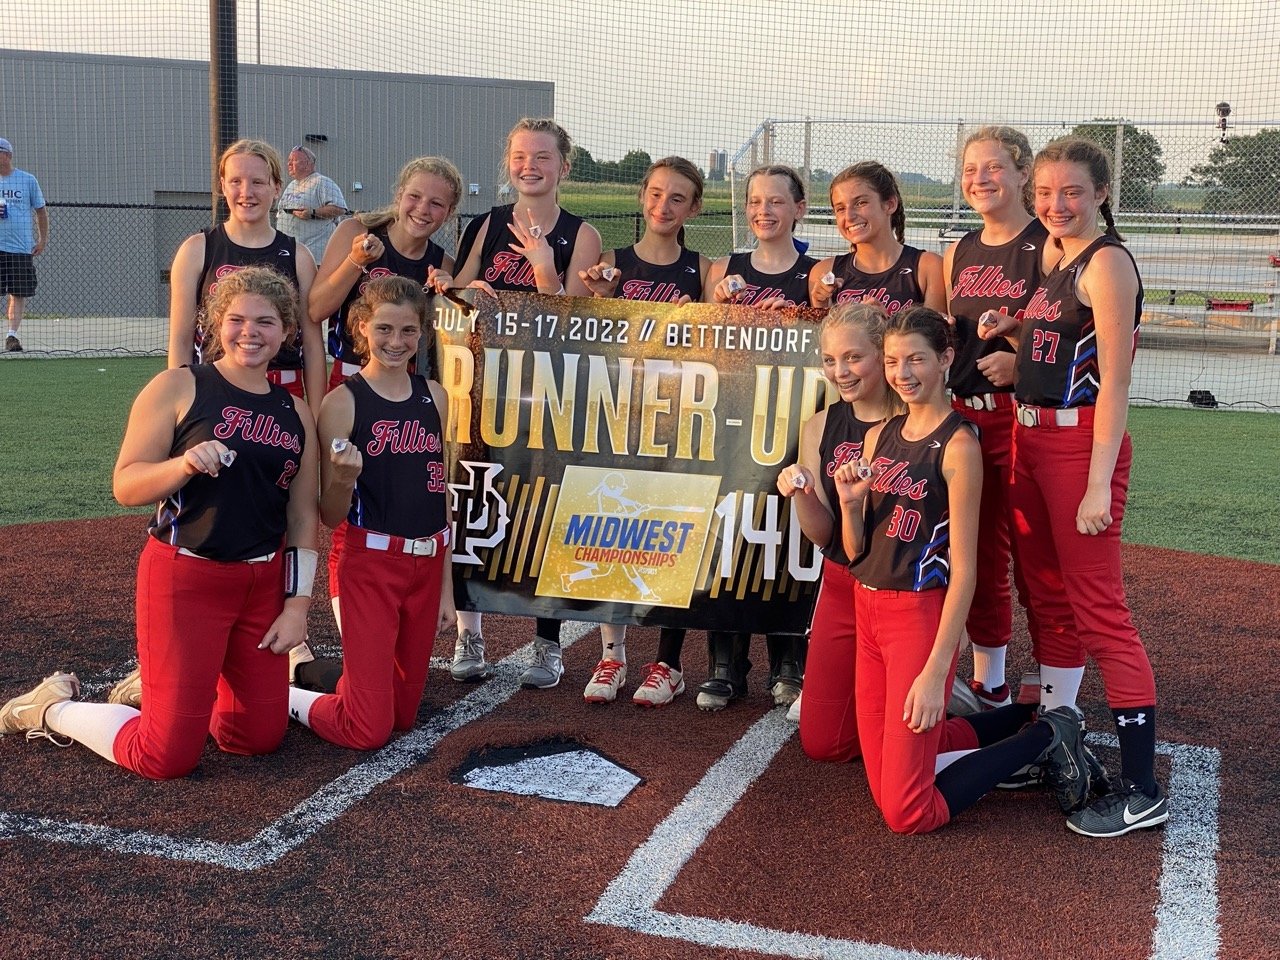
We were undersized, inexperienced, and young. We hoped to win a few more games throughout the season. We ended up playing in a championship game. Unfortunately, the final score of 10-0 in that game was in favor of our opponents. While the result of that game did not have the makings of an inspirational Disney sports film, the outcome speaks volumes to the importance of consistently taking steps toward a positive change. This team’s accomplishments show the power of setting small goals and committing to attainable accomplishments in service to a larger vision.
Make this the year that you walk into the classroom with a clear vision, a plan for enhancing your professional practice, and a commitment to taking all of the little steps along the way to get there!
Seeking opportunities for joy in the classroom
Somewhere in the thick of the many challenges posed upon educators in the last three years, many who have long-loved our work with students have lost their way. According to an article from the National Educators Association (NEA), in “a staggering 55 percent of educators are thinking about leaving the profession earlier than they had planned.” While reported numbers of this magnitude may not surprise anybody that has felt the weight that teachers have carried overt these past few school years, it does begs three questions:
Are experienced educators truly ready to walk away from a profession that has inspired and fulfilled them as professionals, and as humans, throughout their career?
What may be causing the loss of joy for educators as we return to “normal” in our classrooms?
What small steps could an educator take to find opportunities for the authentic joy that has kept them in this profession to this point?
Are teachers ready to walk away?
In conversations with quite a few teachers throughout this school year, the question of leaving the profession has been raised time and again. Frankly, this is not that unusual. The act of teaching is entirely consuming. As a coach, I have had many teachers flippantly suggest it is time to try something else. What is unique is the seriousness with which this suggestion is offered. Colleagues have spoken of the valuable skills they possess. Others have referenced the details of job postings they have considered. The reality of a potential shift in careers is much more palpable.
Why? What is different this year? Most districts have struggled for several years to find substitute teachers to fill staffing holes. This has resulted in all teachers sharing the load of sub coverage each day. That results in more time live with students daily, less time planning with colleagues, less time engaged in professional learning opportunities, less time connecting with friends and colleagues at work, and less time being able to focus on all of the other parts of the job during the day. The trickle effect has been more hours grading, planning, and communicating with families and students outside of school.
This alone may have been enough to push many of these teachers to the brink of quitting. Add to that the societal and political conflicts waging throughout communities across the US, conflicts that call into question core values and how those values should be taught to young people, and educators are placed as sitting ducks amidst the flying shrapnel. For good measure couple this with students still regaining their stamina for full day schooling, longing for the freedom to engage in learning at their own leisure during lockdown, and demonstrating some of the academic after effects of learning through COVID.

While this in no way represents all educators, the reality is that this is a perfect storm of factors that can weigh heavy on anybody’s decision to remain in the practice. Despite the many benefits of serving in schools, the inspiration of helping to grow communities, families, and students, this may be a load too unbearable for many teachers to continue carrying. So yes, many highly skilled teachers that make an impact on student learning are ready to walk away from teaching as a career.
While we acknowledge the reality of this situation, teachers are not helpless bystanders to it. Within those elements that teachers CAN control, there are opportunities to once again find the joy that initially led teachers to the profession. If we can find our sense of purpose again, we can make it through this tough time.
What causes loss of joy as we return to “normal” in classrooms?
While there is not one answer to why many educators are not finding joy in teaching, there is one trend that we can identify and embrace to begin making small shifts in teaching practices that move us toward joy.
Despite the major innovations and changes to teaching and learning that happened as a result of lockdown, one trend that has concerned me throughout the past school year has been the desire to return to “normal.” This desire for returning to normal has been stated repeatedly as a celebration to the end of the odd experience that was living and teaching entirely virtually. That makes sense on many levels — a return to normal would be welcome given all we experienced.
However, suggesting that “normal” teaching practice is (or ever was) the ideal state to support successful teaching and learning, fails to capture several realities. One reality is that educators did not universally find what we now call “normal” to be inspirational, joyful, or successful teaching practice before the pandemic. Neither did many students. Student engagement was a challenge pre-pandemic, and it is a growing epidemic today. The second reality is that normal teaching practice does not stretch us professionally. Despite the many challenges, educators did successfully find ways to amazing and innovative work throughout the pandemic. We kept student learning moving forward. We entirely altered our practice out of necessity. And we made huge strides in entirely shifting the paradigm of what learning has to look like each day. Our students experienced these changes, too, and they have quickly come to realize that learning can look and feel different. We did not see a tidal wave of educators hoping to leave the profession during lockdown, or even immediately following lockdown, which would have been the most natural time for a mass resignation. Why is that?
Virtual teaching and learning stretched teachers in many ways. It was challenging, frustrating, and exhilarating as we broke routines, problem-solved, put the students first, and innovated with what we had available to use. Folded within all of that innovation, teachers experienced the joy connected to personal and professional learning, discovery, pride, growth, and success.
A shift back to pre-pandemic teaching normalcy is a giant step backward in many ways. Despite the relief we feel from not continually having to innovate daily, there is a cost we pay. As teachers shift back to the tried-and-true teaching practices, it is now challenging to find the same level of professional satisfaction we experienced over the past few years. When we grow and transform as humans, we flourish and thrive, and teaching through a pandemic was a period of great personal growth and transformation to find new ways to teach and connect with students.
The opportunity for joy hides within the reality that people are often happiest aas we grow and change. Rather than cling to the rock of what once was acceptable teaching practice, educators will find greater joy in leaving sacred ground to venture out and find new ways to innovate within our classrooms. In observing and connecting with many teachers throughout this school year, many have said that they had re-instituted many of the same routines they utilized in the past. Many have also commented that the students did not respond in the same ways they once did. It is as if the old “tricks of the trade” are no longer working. If what we have always done is no longer yielding the same results, if educators are not fulfilled by the practices and routines they self-select to put in play within their classrooms, there is opportunity to make change and potentially find the joy for which we long.
What can teachers do to find joy?

Adopt
Project-Based
Learning
Your next joyful learning adventure is only a project away!
Finding ways to bring innovative practice to the classroom may be the greatest opportunity to invite change and encourage personal growth. One method to achieve this is to adopt a project-based approach to one upcoming lesson. Centering a unit of study around project-based learning (PBL), which focuses on a tangible outcome/product, an authentic audience, and a goal that has a real-world impact, may just be the spark needed to invite joy into teaching. PBL naturally incorporates many challenges, opportunities to problem-solve, and off-script collaborative moments that will greatly vary the daily routine. The fresh perspective and changing landscape adds an element of excitement that keeps students and teachers eagerly coming back. Additionally, it will stretch and open minds to new ways of thinking that become fuel for teaching and learning. Some of the very best PBL resources can be found on the Buck Institute for Learning’s website PBL Works.
Add Digital Tools to Change Routines
Changing the daily routine by shifting teaching practice will have an inspiring impact on many students. While PBL is one way to do this, smaller adaptations of utilizing new tools in daily routine can also be valuable additions.
Consider adding a “social” component to learning through the use of FlipGrid. This gives students an opportunity to live out their wildest dreams of becoming famous as a “YouTuber” (without the ads or distraction of YouTube) while focusing on academic topics and deepened learning. Tech and Learning has a nice guide to get started with FlipGrid.
Utilizing an interactive presentation approach can also shake up the learning environment, giving every student an opportunity to respond at key points within a lesson. This approach greatly encourages engagement as every student is interacting with questions posed by the teacher, writing or drawing on the presentation, sharing an idea within a post-it/whiteboard tool, or manipulating interactives, depending on the tool you choose. The real benefit of this pathway is that teachers will find many of these tools easy to learn, and widely adaptable to a wide variety of lessons. This gives teachers a new skill that can be regularly used daily, but that never quite feels old and worn out to students. Some of the best places to start with this type of tool might be Nearpod, or SMART Learning’s Lumio (if your district has SMART Notebook, you likely already have Lumio available in your licensing that the district owns). Both tools will make you wonder how you taught without them, and they will add a level of interactivity to mini-lessons and focused instruction that teachers and students will enjoy.
Embrace Creativity and Content Creation
Focus on creation as a means of students demonstrating learning. While teachers already identify “create” as a top level Bloom’s Taxonomy verb/descriptor, often we do not consider all of the benefits creation can offer in classrooms. Deepened learning, which is a requirement of academically focused creation, means more time on task, more focus and attention to detail, more problem-solving and critical thinking, more collaboration with peers, and more consideration of the best ways to communicate ideas. Creation can leave students mentally exhausted, and that is exactly the kind of task that can help us grow, change, and find joy.
Additionally, creation infuses fun. There is nothing predictable in how a student will choose to present ideas when given enough room to be creative. It allows the student to explore their own understanding in fresh ways, offers the teacher opportunities to partner with students as learners and coach them as content creators, and invites other classmates to engage with their peers’ ideas. Creation generates a buzz in the classroom that is both palpable and contagious. It leaves students and teachers smiling, as well as thinking deeply about the learning experience, and that naturally generates the joy that is desperately needed to overcome the slump educators are in right now.
Depending on the tools available in your classroom for student use, you may be more focused on creativity tools for the Chromebook or the iPad. With my own focus on iPads in the classroom, I strongly recommend teachers consider the Apple Teacher program as a starting point for learning more about the creation tools that are already built into the iPad. This resource is particularly useful for learning to use a wide range of the Apple apps that are already built into the iPad. Additionally, the Everyone Can Create eBook series from Apple (free) is an amazing starting point. This series is aimed at Apple users, but is definitely worth a look for non-Apple classrooms as well just to spur some creative ways to think about how to teach any subject with greater creativity.
For Chromebook users, I might suggest Common Sense Education’s article on some of the best web-based Tech Creation Tools. The key is finding tools that are primarily web-based, and thankfully there is no shortage of high quality tools available at a low or no cost for classroom use.
FIND JOY IN TRYING SOMETHING NEW
Many factors can make teachers feel as if they have little control in their classroom: curricular demands, standardized testing, team commitments, administrative expectation, parental expectation, pacing guides, just to name a few factors. However, the reality is that educators are rarely told exactly how to teach every subject throughout the day. As professionals, we often have choice in how we deliver instruction, challenge students, or tailor learning to best meet student needs. While one curriculum may dictate a specific delivery model, another subject may offer more freedom. Seizing those opportunities as places to push ourselves and try something out of the ordinary will help you and your students begin to find the joy needed to keep doing incredible, inspiring work. Shake off the desire to return to “normal” in your classroom — normal was never that interesting anyhow. Instead, be bold enough to take on a new challenge. The challenge is what makes the hard things worth doing!


Create “Hotspot” presentations to engage learners with tools you already know
In a world of digital learning, finding new ways to engage learners without having to entirely learn new tools, websites, or software is incredibly valuable. Learn how to use a standard slideshow tool, such as Keynote or Google Slides, to build engaging hotspot presentations similar to other popular online presentation tools.
This is easy to do and only requires learning one key skill — linking to other slides within the presentation.
In the upcoming weeks, our now novel version of virtual school is going to lose some luster with students. Whatever you are doing today to engage students online will soon become a pattern, and predictable patterns are the kryptonite of engaged learners.
For this reason let’s focus on some new ideas for using tools you may already know and use in order to teach in new ways. In today’s spotlight, I wanted to showcase a way to build presentations (slide decks) that do not follow a linear, start to finish path. We are talking about the use of tools like Google Slides, Keynote, or PowerPoint. This means the audience can click around in the presentation, making choices and clicking on appropriate icons to self-direct their own experience through the topic.
View an overview of how to create a hotspot presentation using Keynote (similar to a Thinglink presentation). This includes directions for grading in Google Classroom.
A “hotspot” presentation is one where a single base graphic will have multiple “clickable” points on it. Each clickable point is a way to present new, relevant information. For clarity, let’s use an example in the periodic table of elements. The base graphic, the periodic table of elements, is at the core of the lesson. As a teacher, you will want to point out many key pieces of information specific to the periodic table. By placing clickable icons over the top of the base image (or in this case clickable “targets” over the top of a picture of the periodic table), you can deliver relevant information, such as the atomic weight, atomic number, and the group to which the element belongs.
When teaching in a face-to-face model, teachers can easily walk students through the deeper elements of a topic in an organized way, but in a linear slideshow presentation (one that starts with the first slide in the slide deck and ends with the last slide), making these connections becomes more challenging for students. This is where hotspot presentations truly shine. With a hotspot presentation, students begin to make natural connections to deeper topics simply through the “links” that are made naturally based upon the way that the presentation is designed.
Designing a Hotspot Presentation
Choose a great focal image
Start with a great base image. This is really the “home screen” of your presentation. Select a topic or point of focus that will continually come back to this base image.
Teaching a lesson on Gettysburg?
Choosing an interesting, detailed, and appropriate image is essential (not too graphic)
Maybe the focal image of somebody like 69-year-old civilian fighter John Burns would be appropriate. There is just enough detail to draw in students, but the details are not entirely obvious at first sight. Some of the key hotspots I might include on this photo are: 1) Burns’ civilian clothing, 2) rifle style, 3) lack of wear on Burns’ boots, and 4) his aged features. This image is authentic and offers just enough detail to highlight some key areas of the topic.
Maybe you are teaching on lesson on the bawdiness of Shakespeare’s plays and why Shakespeare elected to include this in his writing. A good look at some of the features of The Globe will help students to understand that plays were written for the masses of common people. Focusing in on 1) the distance between actors and attendees, 2) the tiers of seating for those who could afford private seating, and 3) the lack of seating in the rows closest to the stage (standing room only), would be great hotspots for this particular image.
The key for any hotspot presentation is selecting a great key image. This is the image the entire lesson is built upon.
Storyboard your slides on paper
I always tell people to draw out complex ideas on paper first. It is so much faster to plan on paper before building a complex, technology-rich tool that just does not work out later due to poor planning.
When designing for a hotspot presentation you need to draw out three key elements.
Focal image with key hotspots indicated
What does your focal image slide look like? You’ll need to roughly mark out the hotspots (artistic skills not needed — text is fine) that you want to identify. It might look something like this picture.
The next planning step is to simply draw out the “map” of the slide show. Keep in mind that this is not a linear presentation. Viewers can click on any hotspot at any time. For that reason, we need to map out the viewer’s experience to make building the presentation easier. Here is an example that I drew just to show a rough outline.
Notice that this presentation is only five slides in total. And three of those slides are nearly identical in their design. This means I can save time by really only having to design three slides, and then copying one of those slides twice to look identical.
Finally, you just need a think through and possibly sketch your buttons. These are the links that will be clicked by viewers. You can get an idea of that from the photo I sketched above. In planning I did not realize I needed a final slide, but as I sketched it out I realized that I wanted a way for the viewer to see a slide on Shakespeare before the presentation ended, so I added the “End” button to my design.
Building a Hotspot Presentation
For the purpose of simplicity, I will assume you already know how to generally build a slide deck presentation. The key to successfully developing a hotspot presentation, then, is just one little piece of information: linking. And whether you use Keynote, Google Slides, or PowerPoint, linking is possible in all of these tools.
Building the Focal Image Slide
The Focal Image slide is made up of: 1) a primary image, and 2) several icons layered on top of that image. Start by adding your primary image to the slide first. This will set the stage for the slide, placing it at the back of images. This will be helpful later.
Next, choose your hotspot icons. This can just be a shape, clip art, or text. I recommend making these icons roughly the same size (copy and paste works well) for a more uniform look in the end. You can also add title text and other text boxes to help viewers navigate the presentation. Once you have this page set up entirely, click on each icon one more time and make sure your layering brings the icons to the front. Again, this just makes it easier to work with later.
Building the first choice slide
Sometimes hotspot presentations can become very long and be quite challenging to build. This tip will save you time. Build and link one of your choice slides (the slides that contain the information about each hot spot) first, and then duplicate that slide. This will make your presentation look more uniform, and it will save you many clicks (and possible linking errors) later.
Your template choice slide needs 3 key items: 1) a space/box for you to type relevant information about the hotspot the viewer selected (as well as a place for additional images), 2) a “home” icon that will take the user back to the focal image slide, and 3) a “end” icon that will take the user to a final slide that will end the presentation.
Linking tutorial for Google Slides presentations, Keynote for Mac, and Keynote for iOS. Learn to link and hotspot presentations are a breeze.
The text/image space is fairly self explanatory. This is where the instructional material will go about one of your hotspots. At this time, just type one identifiable word about the hotspot topic. You can add details later.
Your home icon is just a shape or image that users will click to get back to the focal image slide. Once you have added the shape or image, I recommend adding a little text box on or near it that indicates this link takes the viewer back to the start. “Home” works, but you can use whatever vernacular makes sense. Finally, it’s time to link this image.
Finally, your “end” presentation icon. You will need to build one slide that is your final slide in the slideshow. Think of it as the exit door for your presentation. Without this exit option, your viewers will be stuck in an infinite loop and will never be able to end the presentation.
First, add a slide to your presentation that is the “final” or “end” slide. This will be the final information your audience will see before leaving. Then, back on your first choice slide, create an icon, give it an “end show” label/text box, and link it to the final slide in your presentation. You’ll use the same linking strategy you just learned, but you will point it to the final slide this time.
Duplicate and customize your choice slides
Congratulations. You have done the hard work by building your buttons and links for your choice slides. Now you will duplicate your first choice slide for each choice that you want to viewers to have on the focal image slide. For now, just make these slides and edit them quickly by giving them text that represents the choice. This can get confusing, so document your slides as you go with labels. You can come back to edit and perfect these slides later, but right now we are on the business end of building this slide deck.
Once you are done, it’s on to the final technical step - linking your focal image hotspots.
Linking focal image hotspots to choice slides
That last step in this process (other than adding customized content to your choice slides) is linking the icons on your first slide (your focal image slide) to the appropriate choice slide you just finished creating. And the good news is you already know how to do this. One skill, learning to link to others slides within a presentation, opens up all kinds of possibilities for ways to make your presentations more interactive. So go ahead — click on each icon on your focal image slide and link that icon to the correct slide.
Obviously you have work to do tin adding content to the choice and exit slides, but the skill of linking them together in a unique way is done. For the sake of your audience, please take a moment to check your links. This process can be fraught with errors, and a little bit of link checking now (hit play on the presentation and click on the links) will save your audience of fits and frustrations later.
One last tiP: avoiding auto-advance in slide shows
A hotspot presentation slide show is a non-linear presentations. You are working to create the illusion for the viewer that they are in custom-designed software. Nothing can ruin that illusion quite as quickly as them inadvertently advancing to the next slide, a slide they were not supposed to see because it is out of context.
For my Keynote (and PowerPoint) using friends, I’ve got great news. You can be assured that with the switch of a setting your users will not advance without clicking on a link.
Keynote for Mac
With the Keynote presentation open on your Mac, click on the Documents button in the upper right. Under “Presentation Type” select “Links Only”. That will take care of it. The audience will not be able to advance without clicking on a link.
Keynote for iOS
With the Keynote presentation open on your iPad, click “…” icon in the upper right. Click “Settings” and under “Presentation Type” select “Links Only” to stop any auto-advancing in the presentation. This will halt viewers from moving forward without clicking a link in the presentation.
Google Slides
My apologies to my friends using Google Slides, but this is one feature that is sorely missing from Slides. The best option that I can offer you is a work around at best. On EACH slide you will create one more box. You will need to link that box to the slide that it is on. So if you are on slide 2, create the box, and then link that box to go to Slide 2. Finally, select the box, drag it out to the full size of the slide (so it covers everything on the slide), and then select “Arrange” —> “Order" —> “Send to Back”. This will place your box, with the link to the same slide it is presently on, in the background. If a user accidentally clicks this box, they will be tricked into thinking nothing happened, and will be presented with the same slide to pick a different option.
I know! So annoying! But it works and it is something that will let you achieve a similar effect in Slides if that’s the tool you have access to.
New use of tools you already know
So the next time you are looking for a fun way to present ideas to your audience in a different way, consider using a tool you already know in a slightly different way. The impact on and engagement of your audience will reap rewards making the time invested well worth it!
And if you use tools you already know and have access to in your instruction, you can parlay that personal learning into activities you can also have students do to deepen their learning, build upon their skills for productively using technology, and challenge their thinking.