
Removing barriers to MEANINGFUL technology use!
Teaching Students to Become Image Detectives
When we teach students to read, we teach them techniques for finding context clues within a text. We show them how to annotate text, marking it up so they (and we, as their text guides) can visually identify their thought process throughout the text.
In a visually rich world where students just as commonly encounter visual elements (photos, videos, gifs, emojis, memes, etc.), we should also get serious about teaching students how to "read" the clues and context available within visual media. While marking up text-based media has always been far more common in literacy instruction, we now have tools readily available to annotate or "mark up" images in the same ways to help us uncover their thinking as they observe images.
There are tools available on any device to do this with ease with your students. If you are in an iPad classroom, you can use the Markup tool in the Photos app. If you are using Chromebooks, you can just as easily use Google Drawings to do the same kind of activity in class.
Setting Up a Successful Image Detective Lesson
Teaching students to look closely as images is not a new idea. Teachers have long used images to capture a student's interest an attention, to create context, or to encourage students to ask questions about a topic/subject. However, to help students develop the skills of being image detectives, we need to carefully select the right images and utilize the right tools to let students "uncover" the key clues.
The process starts with three key components: a topic, a driving question, and interesting imagery.
Topic and Question
Every content area lends itself to some level of imagery exploration, so this will work in any classroom. The real challenge is asking questions that students will find compelling, and that can truly be answered by the images that you uncover. To begin, develop a generic question you will have students answer, which will give you a starting point to begin your image search. This is the "rough draft" of your question for students to answer. You will need to be flexible with the question, adapting it to fit perfectly once you find the right image.
Selecting an Image
Images are everywhere on the Internet. However, not just any image will do for this kind of investigation. When selecting an appropriate image for this type of lesson, the goal is to find images that have historical, geographical, or contextual clues hidden within them. There has to be evidence within the image to tell a story, which can in turn provide points for students to consider and discuss.
Let's look at an example of two images. The generic question I want students to ponder is this:
"What is it like for an immigrant to start a new life in a new country?"

The top image is from a wonderful site that teaches students how to become Image Detectives. The lower image is from a Google search which turned up an image from a 2006 immigration march in Washington D.C.
Both are images intimately tied to immigration. The lower image is far more timely, relevant to our students lives, and attractive to view (color, interesting subject, focused). But the upper image -- there is so much more richness of detail. While we could definitely foster a conversation with the lower image, the upper image lends itself to student exploration. And that is exactly what we are looking for when we select an image for students to explore and uncover.
Once you have selected the right image, you can then tailor your question to the image to promote even richer thinking and conversation.
"This family that has recently immigrated to America.
What issues may they be confronting as a result of this life change?"
Using Technology to Annotate Images
For those in an iOS/iPad environment, marking up images on the iPad has become very simple. You no longer need an additional application. The Markup function on the iPad comes baked in iOS 10 and beyond.
Start by distributing the image to your students so that every student has a copy of the image on their device in the camera roll. This can be achieved in a number of ways. Whether using the AirDrop function (especially if you use Apple Classroom where you can AirDrop to all students with one click of a button), or just placing the image in Google Drive or on a class website, the goal is for the students to save the image to their iPad Photos.
Next, your students will be accessing the Markup tool in the Photos app (yep, the one that came with the iPad!).
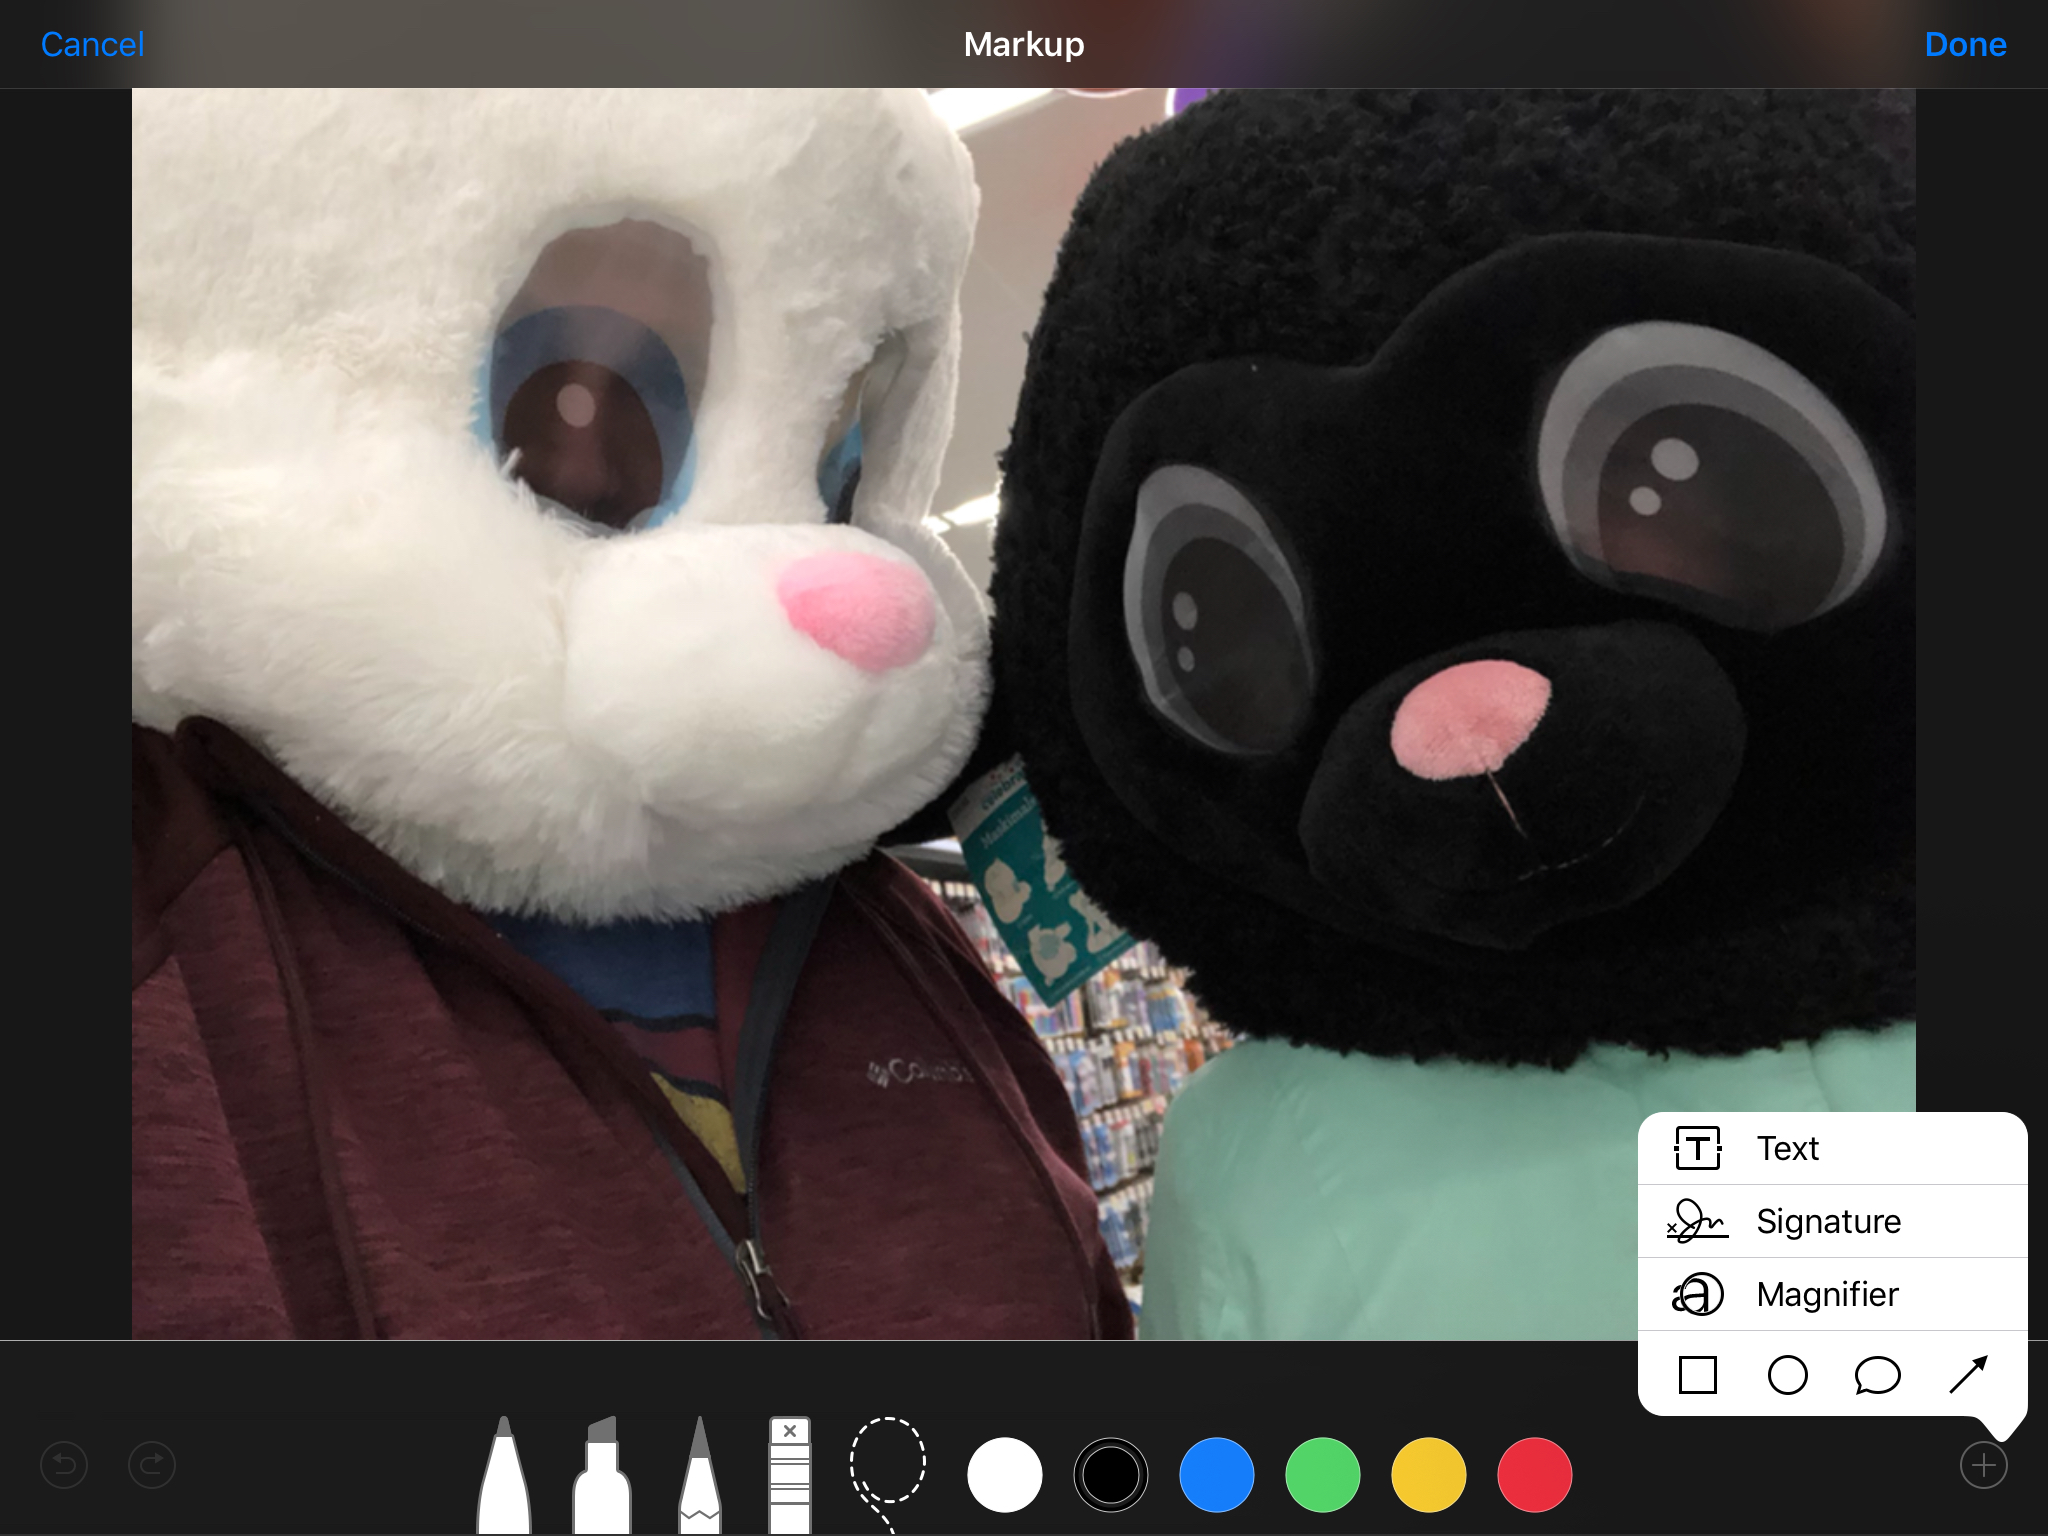
A full range of image editing tools will appear as a part of the "Markup" tool set.
- Open the Photos app, tap on the image you shared with your students, and "Select" the image.
- Then click "Edit" to reveal the editing tools, and select the ellipsis button (three dots).
- Select the "Markup" tool. The drawing tools will appear.
- When finished, select "Done" and the drawings/text/shapes placed on the image will be saved as a part of the image.
You will need to teach students how to use some of these editing tools to produce better results. For instance, instead of handwriting on the image with the pen, use the text tool to type to make the writing smaller and more legible. Use shapes and arrows to point out specific details in the image. Use the pinch gesture to zoom in and out of the picture to get close to the details while drawing on the image.
Here is an example of the work a student might produce.

Notice how typed text makes it easier to read. Also, using color can help point out different types of details the student has uncovered in the image they are annotating.
While Markup works in the iOS/iPad environment, there is a similar tool that works on Chromebooks and computers: Google Drawings. (Drawings does NOT work on the iPad at this time.)
This instructional video from Kelly Hollis (@hollis_k) will demonstrate a similar process for marking up images using Google Drawings.
Fostering a Conversation for Image Detectives
Depending on the images a teacher has selected, there can be great clarity and agreement on what story is being told in the image based upon the clues that are available, or there can be considerable disagreement and discussion. As with any deep thinking activity, it is important to find ways to have students share their ideas/perspective and listen to the findings/thoughts of others.
One way to do this in an iOS environment is to have students AirPlay their image to the classroom Apple TV if one is available. Here every student can quickly and efficiently share their ideas. Another way to do this is to have students select a partner and AirDrop their individual image to their partner for review and discussion.
If you are in a Google environment, you can easily share Google Drawings with another student to start the conversation.
Sometimes the details in an image can be rather limited. There may not be enough details to uncover for all students to have an opportunity to share. This does not mean, though, that any student should be allowed to opt out of sharing their thinking. To be sure all students get a chance to share, you can use Padlet to foster an online conversation. (I know that Padlet has become far more limited since introducing their pay model, but even if you only have three free Padlet boards, you can at least spark a conversation in your classroom. Remember -- for ed tech companies to exist at all, they need to be able to make a profit.) You could just as easily use a Google Doc or Google Slides presentation, though, shared with all students allowing them to upload their images to the presentation or document.
The key is reflection and debriefing. How can you get your students to talk about what they have uncovered? When students talk about their thinking, they learn! And that is the ultimate goal in any activity we do with students.
Feel free to share your ideas in the comments below about how you have encouraged your students to become image detectives. What tools have you used? What have you witnessed for results in student learning?
Students still care deeply; encourage them to tune in!
Not long ago an executive at a large local company said to me, "Kids are truly just different these days. I see it in the young employees that I hire. You must see that all of the time, right?"
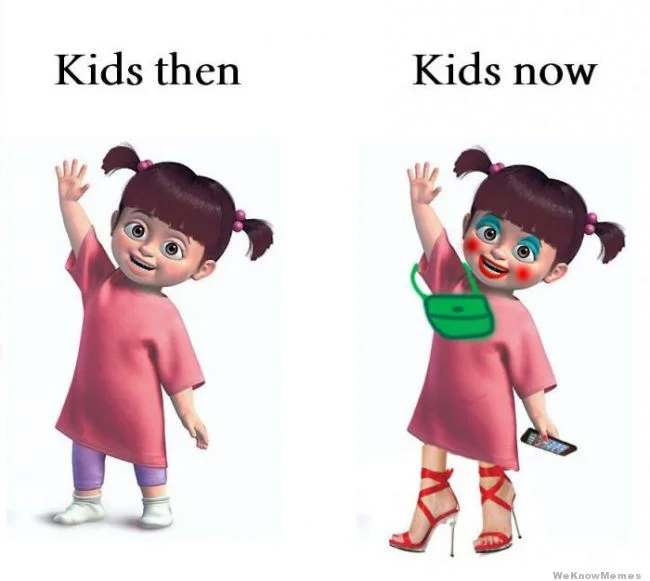
I paused. It's something I tend to hear a lot, but not just from people outside of education. Those words have been spoken to me by numerous teachers over the years. These words tend to reflect a genuine belief and they are validated by some of the ways we view young people today.
Then I responded as I always do. "No, I don't believe kids are different today than they ever were. Society has shifted. Parenting has shifted. Adult expectations of kids and our focus on nurturing young people's growth and potential has largely shifted. But kids have not fundamentally changed. And I know this because I have seen young people who light up, get motivated, and go all in on those things they truly get excited about, even with topics that wouldn't excite most adults at times. I witness it over and over in my work with teachers and students, and that proves to me that kids haven't fundamentally changed."
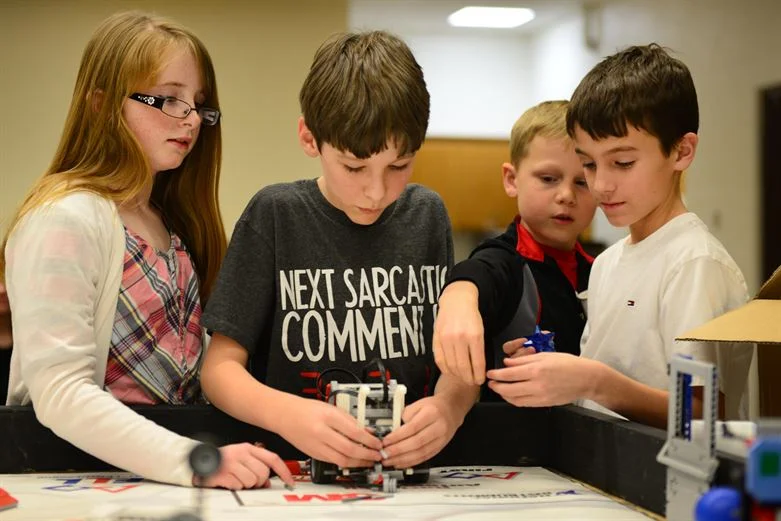
Put a student in a river with a kick net and a mission to find out which critters live in the river and what that tells us about the river's health. Place a student on a structured, purposeful web conference call with students from across town, across the country, or across the world. Ask them to identify a problem of significance to them in their world and then find a reasonable solution to solve it. Even more simply, challenge them to solve a series of riddles/clues in an in-class competition or an EduBreakout. Have them argue their side in an in-class discussion or socratic seminar, have them teach other students with an instructional flipped video that others will see, or create a presentation they will deliver to an audience of people that will listen and engage with their ideas. These are all examples of things I have seen in the last few years where students came passionately alive in their work.
Kids still want to learn and grow...
We have to find ways to engage them!
No, I truly do not believe kids are different today. They may be a little harder to engage at times considering the outside forces we compete with: instantaneous feedback with friends on social media, the ability to binge watch the shows that suit their exacting interest on streaming services, or a constant stream of access to enticing games and music that are their constant companions.
While educators do have to compete with these forces for our students' attention, the kids themselves have not shifted. They are exploring the world, trying to find their place and purpose, and attempting to figure out what type of person they would most like to be. As educators, we have the opportunity to expose them to the things we are most passion about, opportunities and topics they have never experienced or heard of before, and we can be the ones to lead them down paths that they will continue on for the rest of their lives.
However, doing something of such significance might require us all to shift our approach to how we structure these learning opportunities. We have to think more like independent entrepreneurs trying to engage our customers, and less like members of an institution that requires our clients to attend.
Although our kids' ability to dig in deeply and do great work has not fundamentally changed, society has. And it has given ALL of us the opportunity to elect when we will be present and actively engaged, and when we will opt out. We have all benefited from, or fallen victim to that reality. And because we have this experience as consumers of the things we are most interested in, we can use that experience to think differently about how we can best reach our students. The challenge for educators is to find exciting, engaging, meaningful ways to get our students to tune in and give our inspiring "channels" a try.
Bored Teacher Summer Learning Series - Blogging with Students
It's 8:00 am on a gorgeous Saturday morning in July and I know you are having EXACTLY the same issue I am -- you miss your students! You are sitting there thinking of ways to meaningfully engage them in the fall and to make writing just a little more meaningful and interesting for them. Trust me, I'm right there with you!
Well, Bored Teacher, start thinking more deeply about ways to have your students write more and have them write more online through the use of a blogging tool.
Sound interesting? It really is. In fact, it can even be somewhat addicting. Imagine that; writing can be addicting!
 What is a blog?

What is a blog? Well, put simply, it is a website that is regularly updated by an author (or team of authors). Blogs in Plain English. Although it is six years old, it STILL accurately describes this lasting technology. As you watch it, think about how this opportunity could impact your students if put in the role of writing the content, not just reading it.
There are other parameters as well. Typically, blogs have the newest content at the top. They also typically have a "feed" or a means of subscribing to them for regular readers. There is a great video that nicely sets out a working understanding of what a blog is:
Key Questions
Okay, so we've set the stage. At least we now know what a blog is. However, the two primary questions are: 1) Why would I use a blog with my students in my classroom?, and 2) How would I go about setting up a blog? What tools would I use?
Why would I use a blog with students in my classroom?

Well, the "why" isn't a question that we can provide an adequate answer that suits everybody's needs. Generally speaking, though, blogs provide a couple of important opportunities.
- Students have an opportunity to write for a "real world" audience. That means that anybody in the world, or at least anybody that reads their blog, sees their thoughts, ideas, feelings, and engages with their work in some way. Compare that with a more standard view many students take of writing, where they feel they are writing for a single or small group of adults, and possibly a few students. That expansiveness of audience can be an important element for many students.
- People might comment back on their written work. By people, I don't mean a teacher marking the text for "teachery" technicalities. I mean their fellow students, maybe other teachers, maybe their parents, maybe a partner classroom from across the country/world, or possibly even an outsider who stumbled upon their ideas in a Google search. This level of exposure raises the bar of accountability for MANY kids and encourages them to give a better effort on their written work than they may have otherwise engaged in.
- Their body of work amasses neatly on their blog. We all understand the power of maintaining a portfolio of written work to reflect upon, to inspire us, and to proudly point to when it comes time to share with others. A blog neatly organizes student thinking and writing in a way that is searchable, easy to share, and lasting. It's something to be proud of when you spend a semester or year writing and realize that you have generated and fleshed out a LOT of ideas over the course of your class.
- Blogs posts are EDITABLE, so they truly emphasize the process of writing. This does drive some teachers crazy from an assessment perspective, but blogs can always be edited. Previous posts that were not well thought out, or ideas that have been further developed can be re-written on a blog. It's a powerful opportunity for us to share the process of writing over the finality of hitting print and turning in whatever we have done at the time.
Those are just a few key reasons. If you can think of more, add them in the comments section to this blog post. We'd love to hear your thoughts on the topic.
What tools would I use for blogging?
In some ways, this question can be the catch point for many teachers. They want something that is easy to manage, safe, and valuable to students all at the same time. Finding the perfect tool that does ALL of these things without sacrificing one of those three for the other is tough. As is the case with most choices in life, when selecting a blogging platform/tool, there are choices and trade offs to make. Let's see if we can give you some help, though.
The primary tools we will look at in this blog are the tools most readily available to students and staff in our district: Blogger and the Blackboard blog tool.
Blogger
Blogger is a Google owned blogging tool (the same tool used to create this very blog) that is available to all students and staff in our district. The same email and password used for your staff or student Gmail account will allow you to set up a blog with Blogger in minutes. It is typically very easy to use, used by millions of bloggers around the world, and is directly connected to a wider audience of readers.
The advantages to using Blogger:
- Incredibly easy to use. Teachers will not need to spend a lot of time learning to set up or use the tool, and little instructional time is needed to teach the tool to students.
- Already works with the Gmail accounts provided by the district. That means no additional usernames and passwords to recall. This also provides a safety valve in the event that a teacher or staff member needs to log into the blog for security/safety reasons.
- Wide variability in the scope of each blog's reading audience with Blogger. Blogger can be used to publish publicly to the world, or it can be limited to just specific email addresses. Publish your class blog to the world. Limit your student blogs availability to teachers and students only. It's all possible.
- Commenting is built in to each blog. This opens the door for feedback, conversation, and interaction between writers and readers. Commenting can often be the biggest hook for writers as they receive genuine feedback from their audience.
- Customizable look and feel for each blog. With millions of users out there, that's a lot of templates and tools that can be added to each blog to change the general feel of the blog.
- Tech support is a Google search away. With so many users of Blogger, learning to do ANYTHING with Blogger generally requires a simple Google search to find the answers you might need.

- The blog can be opened to a world of readers, but not all readers are trustworthy or have the best intentions of students in mind. As a teacher, this means you need to have a ongoing conversation with students about Internet bullies, trolls, and appropriate conduct, as well as an action plan that students know and can follow when their blog receives inappropriate comments. It is ALWAYS recommended that teachers engage with parents about the decision to publish a blog publicly (to the entire world).
- Commenting opens the door for inappropriate communications. Just as with the decision to publish the blog to the world is an option, turning commenting on/off is also an option. However, commenting is the primary hook of blogging for many students. Although it is possible for the student to turn comments off, they can also opt for turning comments on just as easily, and they are likely to do so!
- Students are the owners of the blogs, meaning they are in control of the blog. Depending on your viewpoint, this may also be a positive as they take on responsibility for their blog. However, students can make decisions about their blog settings that teachers are not informed of. While the district has the ability to log into student accounts and make changes, that is an action typically performed by request AFTER something undesirable has happened. This means students need to be empowered and educated on the proper uses of this platform.
- Scatter can be a BIG problem for teachers when it comes to blogging. Each blog has its own web address, meaning a teacher will have a different website to visit for each student assigned to them. That's a lot of links to follow. Savvy teachers will use a Google Form (students submit the URL for their blog so the teacher has one spreadsheet with all of the blog URLs in one place) or a RSS Feed Reader (I like this one...Feedreader) where they enter the URLs and each UPDATE is pushed to the Feedreader so teachers are seeing the most recent changes to each blog. However, this is an extra layer of management that turns some teachers off.
Blackboard Blog Tool

- Blackboard Blog tool is a part of a Blackboard course. Every student and teacher in the district already has a username and password for Blackboard, and a growing number of teachers are using this tool for placing resources online for student access. With the flip of a switch, the Blackboard Blog tool can be turned on and active in your Blackboard course, giving the teachers and students a single place to go for both content and communication tools.
- Blog posts in Blackboard are limited to a SMALL audience -- the teachers and students (and possibly parents) enrolled in the course. Nobody else. Depending on your perspective, this can be a huge advantage to blogs that are open to the entire world. This also eases the concern of some parents who do not wish for their children to publish to a much wider audience.
- Commenting is built into the tool, but again is limited to only the students enrolled in the Blackboard course. However, each comment is tracked and teachers can easily see who made each comment and when. This gives teachers an advantage as they are maintaining accountability in their classroom and teaching commenting/feedback skills.
- Teachers have a single link to visit to see ALL of the student blogs, comments, and interactions. This makes assessment of a blog much more manageable.
- Blogs can be built into lessons easily. Using the power of Blackboard, a teacher can organize videos, content, readings, and then ask the students to blog their thoughts and reflections within the context of what was just covered. This can give the blog assignment/reflection greater value as it flows well within the scope of the lesson plan instead of being an add-on after the fact.
- Audience is limited. This is a biggie not to be underestimated. A Blackboard Blog can NEVER be made public to the whole world. It will always be limited to a small audience of peers within the course. For some students knowing the world might be reading ups the ante and they take writing more serious as a result. That will never be an option with the Blackboard Blog tool. One work around is for teachers to set up a single class blog on which to copy and paste the best student reflections (from Blackboard Blogs) to a class blog opened to the world using a tool like Blogger.
- Commenting is limited. This ties into the first disadvantage, but there will never be any surprise responses/comments from readers. Those are the types of things that infuse excitement and authenticity into blogging for many students. With a locked down audience, this is nearly impossible to reproduce in the Blackboard environment.
- Teachers need to utilize Blackboard. While we don't necessarily feel like Blackboard is a disadvantage, there is a steeper learning curve to learning to use Blackboard over Blogger. That can take some time. However, once you learn Blackboard, you'll be amazed at all it can do to make teaching and learning a more efficient process. It is time well invested.
Learning to Use These Tools
